Duration 4:45
Part 2: First steps → FastAPI tutorial for beginners - building the FastAPI docs vscode
Published 26 May 2023
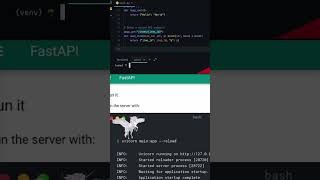
In this video we code the “First Steps” page in the FastAPI docs Tutorial. We import FastAPI and create a FastAPI class instance, make an API endpoint, and discuss the automatic JSON serialization and async functions FastAPI provides. We run the FastAPI app in the browser using Uvicorn. This video is part of the FastAPI tutorial for beginners playlist, where we work through the FastAPI docs. Subscribe here → /channel/UCcjFHTrFLJ85arzj6PfTiWg Like this video and drop a comment, it really helps me out, thank you! ┉┉┉ Share this video 🔗 Video link → /watch/Qb0oO2ie7A5eo ┉┉┉ You might like these, too Python QuickStart Guide Learn Python with my affiliate link → https://amzn.to/42La1oQ Python Crash Course Best selling Python book, my affiliate link → https://amzn.to/3q3LflH ┉┉┉ Follow me YouTube → /@ runthat Reddit → https://www.reddit.com/user/m_runthat Twitter → https://twitter.com/m_runthat Instagram → https://www.instagram.com/m_runthat/ Blog → https://www.runthat.blog ┉┉┉ Chapters in this video 00:00 Introduction 00:25 The last playlist video 00:44 Import the FastAPI module - pip 01:04 Create a FastAPI app 01:15 Create a path operation decorator 01:43 Define path operation function & async functions 02:26 Return content & automatic JSON serialization 03:22 #runthat with the Uvicorn server 03:45 Check it in the browser ┉┉┉ Video concept summary This video is part of the FastAPI tutorial series for beginners. We'll be working through the "First Steps" page in the FastAPI documentation. (https://fastapi.tiangolo.com/tutorial/first-steps/) In the last video, we set up Visual Studio Code and installed FastAPI. The FastAPI docs are a comprehensive resource for learning and utilizing FastAPI, a modern, fast (high-performance), web framework for building APIs with Python. The FastAPI docs provide extensive documentation, tutorials, and examples to guide developers in understanding and leveraging the features and capabilities of FastAPI. Video outline Step 1 is importing the FastAPI module, which provides the functionality we need for our API. We create a Python file called `main.py` and import FastAPI using `from fastapi import FastAPI`. This gives us access to the `FastAPI` class for creating our application. Step 2 involves creating an instance of the FastAPI class. We create a variable called `app` and assign the instance of the FastAPI class to it. Step 3 introduces the path operation decorator. We associate a function with an HTTP GET request to the root path using `@app.get("/")`. This decorator tells FastAPI to execute the decorated function when a GET request is made to the root path. Step 4 is all about defining the path operation function. We use the `async` keyword to create an asynchronous function called `root()`. This allows the function to handle multiple tasks simultaneously without waiting for each task to finish. The `async` keyword in Python is used to define an asynchronous function. It is part of Python's asynchronous programming capabilities introduced in Python 3.5 with the `asyncio` module. To learn more about asynchronous programming and the `async` keyword in Python, you can refer to the official Python documentation on "Coroutines and Tasks" in the `asyncio` module. Here's the link to the relevant section in the Python docs: Coroutines and Tasks 🔗 https://docs.python.org/3/library/asyncio-task.html Step 5 focuses on returning content in response to the GET request. We can return various Python data types, such as dictionaries, lists, strings, etc. FastAPI automatically serializes supported data types to JSON before sending the response. Unlike some other frameworks, FastAPI handles the JSON serialization automatically. FastAPI, Flask, and Django are all popular web frameworks for Python, but they differ in their approach to JSON serialization. In FastAPI, JSON serialization is handled automatically. When you return Python data types such as dictionaries or models from your route functions, FastAPI will automatically serialize them to JSON format before sending the response to the client. In Flask, you need to use the `jsonify` function to convert Python data to JSON format before returning it as a response. Similarly, in Django, you typically use the `JsonResponse` class to serialize Python data to JSON format. To see our Hello World app in the browser, we use the command `uvicorn main:app --reload` to start the server. Clicking the local server URL or copying it into the browser will display our "Hello World" JSON response. That's it for this video. In the next video, we'll cover the "Path Parameters" page. Remember to like the video, subscribe for more Python tutorials, and I'll see you in the next one. Thanks! ... WATCH THE VIDEO FOR MORE!
Category
Show more


Comments - 3
Related videos for Part 2: First steps → FastAPI tutorial for beginners - building the FastAPI docs vscode: